Professional carriers conduct their own inspections, but relying solely on their documentation leaves you vulnerable if damage occurs during transit. Your pre-shipping photos and notes provide independent evidence of your vehicle’s condition, giving you leverage in insurance claims if the carrier causes damage during loading, transport, or delivery.
This complete vehicle inspection before auto transport guide provides a step-by-step checklist covering every aspect of proper vehicle documentation, common issues to flag, and how to protect yourself throughout the shipping process.
Why Is Pre-Shipping Car Inspection Important?
Pre-shipping car inspection protects you from false damage claims, provides evidence for legitimate insurance claims, documents existing issues preventing carrier disputes, and establishes baseline condition before transport begins. Without thorough documentation, proving damage occurred during shipping becomes extremely difficult.
Legal protection: The bill of lading you sign with your carrier becomes a legal contract documenting vehicle condition. Damage not noted on this document gives carriers legal grounds to deny responsibility, claiming issues existed before transport. Your independent photos and notes counter carrier denials by proving damage timing.
Insurance claim evidence: Carrier cargo insurance typically covers $100,000-$250,000 in damage, but claims require proof that damage occurred during transport. Pre-shipping photos showing undamaged condition plus post-delivery photos showing new damage create the evidence needed for successful claims.
Dispute prevention: Carriers sometimes note pre-existing damage you weren’t aware of during pickup inspection. Your prior documentation helps you verify whether noted damage actually existed or appeared during loading, preventing unjust damage attribution to your vehicle’s pre-transport condition.
Peace of mind: Knowing you’ve thoroughly documented your vehicle’s condition allows you to relax during transport rather than worrying about potential disputes. The 15-20 minutes spent on proper inspection provides confidence that you’re protected if problems arise.
How Do You Inspect the Exterior Before Shipping?
Inspect the exterior before shipping by photographing all sides from multiple angles, documenting existing scratches or dents, checking paint condition and chips, examining windshield and windows for cracks, and noting any rust or body damage in your pre-shipping car inspection checklist.
Photo documentation strategy: Take 20-30 photos covering every panel from multiple angles and distances. Shoot wide shots showing entire sides, then close-ups of any existing damage. Include clear shots of front, rear, both sides, roof (if accessible), and all four corners. Photos should show readable license plate confirming vehicle identity and include timestamps if your camera supports them.
Paint and body inspection: Walk around the entire vehicle in good lighting examining paint for scratches, chips, dents, or dings. Common damage areas include door edges, bumpers, hood leading edge, and rear hatch. Note even minor blemishes—what seems insignificant now becomes important if carriers claim damage existed before pickup.
Glass condition check: Examine windshield, rear window, side windows, mirrors, and sunroof for chips, cracks, or scratches. Small windshield chips can crack during transport vibration, so documenting their pre-existing presence protects you from damage claims. Check window tinting for bubbling or peeling that could worsen during transit.
Lights and trim inspection: Check all headlights, taillights, fog lights, and side markers for cracks or moisture. Inspect chrome trim, plastic body cladding, door handles, and antenna for looseness or damage. Note missing or damaged emblems, badges, or decorative elements that could be lost during transport.
Wheels and tires: Photograph all four wheels showing any curb rash, scratches, or dents. Check tire tread depth and look for unusual wear patterns, bulges, or damage. Note if tires are mismatched or show signs of previous repair. Document wheel covers or center caps that might separate during loading.
What Should You Check Inside the Vehicle?
Check inside the vehicle for existing damage to seats, dashboard, interior trim, electronics functionality, and personal items before shipping. Interior inspection takes 5-10 minutes but documents baseline condition and ensures you remove all personal belongings not allowed during transport.
Seat and upholstery condition: Photograph front and rear seats showing any tears, stains, or wear. Check headrests, armrests, and door panel fabric for damage. Document any modifications like seat covers, floor mats, or cargo liners that should be present at delivery.
Dashboard and controls: Note condition of dashboard including cracks, fading, or damage to instrument cluster. Test that all buttons, switches, and controls function properly including climate controls, window switches, and infotainment system. Document warning lights currently illuminated on the dashboard.
Electronics and features: Test radio, navigation, backup camera, and other electronic features confirming they work before shipping. These systems are sensitive to vibration and electrical issues, so documenting their pre-shipping functionality protects you if they malfunction after delivery.
Interior damage areas: Check headliner for sagging or stains, examine sun visors and mirrors, inspect center console and cup holders, and look at door panels and handles. These areas often show wear that becomes contentious in damage disputes without prior documentation.
Personal items removal: Remove all personal belongings from glove box, center console, door pockets, and trunk. Most carriers prohibit personal items, and their insurance doesn’t cover belongings. Anything left in the vehicle becomes your risk, and carriers may refuse transport if they discover prohibited items during inspection.
| Interior Checklist Item | What to Check | Documentation Method |
|---|---|---|
| Seats | Tears, stains, wear, adjustments | Photos from multiple angles |
| Dashboard | Cracks, warning lights, controls | Photos showing instruments clearly |
| Electronics | Radio, nav, cameras, windows | Test and note functionality |
| Trim | Door panels, console, headliner | Photos of any existing damage |
| Personal Items | Remove all belongings | Verify empty compartments |
How Do You Document Mechanical Condition?
Document mechanical condition by recording exact mileage, noting current fuel level (keep at quarter tank or less), checking for fluid leaks, testing all lights and signals, and noting any mechanical issues like engine noises or transmission problems on your vehicle inspection before auto transport checklist.
Mileage documentation: Photograph odometer showing exact mileage clearly. This protects against mileage discrepancies between pickup and delivery. Some carriers drive vehicles short distances during loading/unloading, so noting precise starting mileage helps verify minimal distance traveled.
Fuel level management: Maintain quarter-tank or less fuel during shipping. Full tanks add weight increasing transport costs and create fire hazards. Photograph fuel gauge showing level, and note it on the bill of lading. Carriers may refuse vehicles with too much fuel.
Fluid leak inspection: Check under vehicle for oil, coolant, transmission fluid, or brake fluid leaks. Start the engine and let it run for 30 seconds, then check for new leaks. Document any existing leaks with photos showing the affected area and leak severity. Carriers may refuse vehicles with significant leaks.
Warning lights and issues: Note any dashboard warning lights illuminated including check engine, ABS, airbag, or other alerts. Document known mechanical issues like rough idle, transmission slipping, or unusual noises. This prevents carriers from attributing pre-existing problems to transport damage.
Battery and starting: Verify vehicle starts reliably and battery holds charge. Carriers need to start, move, and load your vehicle multiple times during transport. A weak battery causing starting problems creates delays and potential disputes about whether the battery died during transport.
What Documents Do You Need During Inspection?
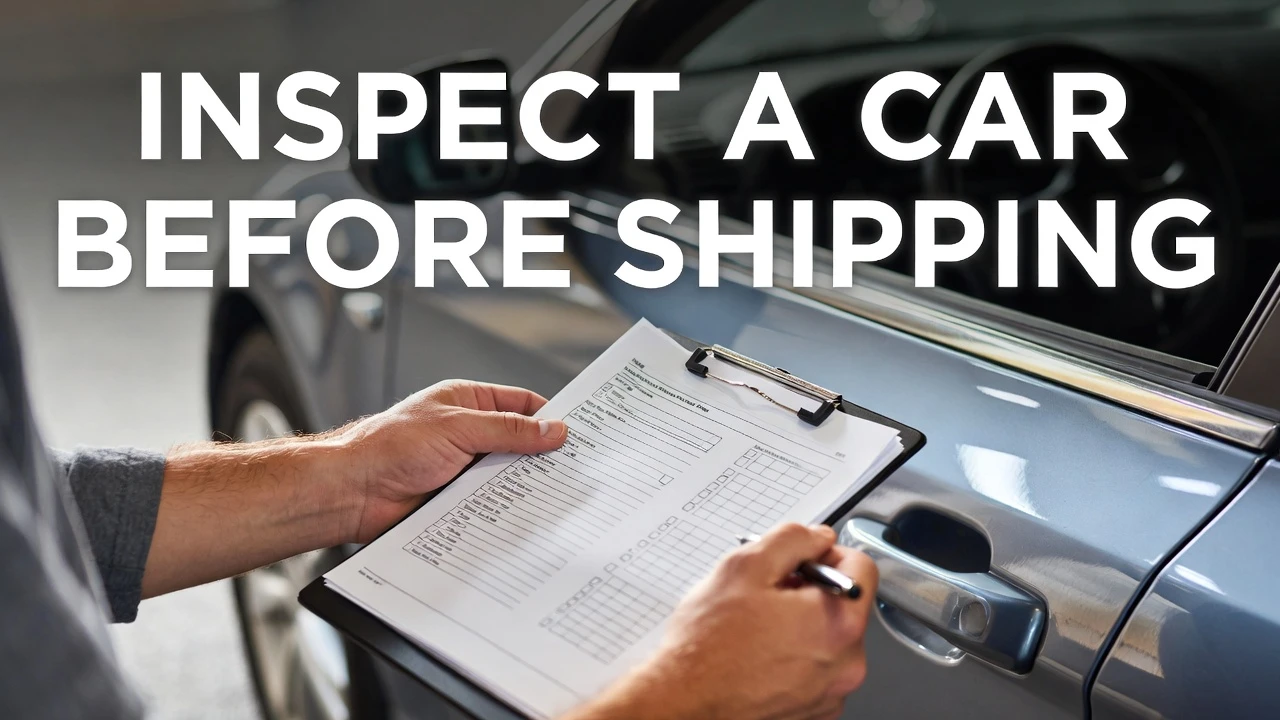
You need your bill of lading, pre-shipping inspection checklist, photo documentation, vehicle registration, and proof of insurance during inspection. The bill of lading becomes the legal contract between you and your carrier, so completing it accurately protects your interests.
Bill of lading requirements: This document lists all existing damage both parties agree upon before transport begins. Review it carefully before signing, ensuring every scratch, dent, or issue you documented appears on the form. Never sign a blank bill of lading or one with incomplete damage notation.
Photo organization: Organize your pre-shipping photos by category (exterior, interior, mechanical) with timestamps. Store copies in multiple locations including your phone, cloud storage, and email to yourself. These photos become crucial evidence if damage disputes arise.
Written notes importance: Written descriptions supplement photos by noting details not obvious in pictures like paint chip locations, mechanical noises, or interior odors. Date and time-stamp your notes, and consider having a witness sign them for added credibility.
Carrier inspection coordination: Walk through your documentation with the carrier’s driver during pickup, pointing out noted damage and comparing your photos to the bill of lading. This collaborative approach ensures agreement on vehicle condition before transport begins.
For complete guidance on working with carriers during transport, see our comprehensive carrier guide explaining the entire shipping process.
What Common Issues Should You Flag Before Shipping?
Flag common issues before shipping including existing paint damage, windshield chips, modified parts or accessories, aftermarket additions, and mechanical problems that could worsen during transport. Proper documentation of these issues prevents disputes and protects you from false damage claims.
Paint chips and scratches: Minor paint damage is extremely common and often disputed after delivery. Photograph every chip, scratch, or scuff before shipping, using close-up shots showing exact locations. Carriers sometimes attempt to blame transport for pre-existing minor damage without proper documentation.
Windshield condition: Small chips can crack during transport vibration. Document all windshield damage with photos measuring chip size using a coin or ruler for scale. This evidence proves cracks that develop during transport started from pre-existing chips.
Aftermarket modifications: Spoilers, body kits, lowered suspension, and custom wheels are especially vulnerable during transport. Document these modifications thoroughly, noting any existing damage or loose components. Consider removing easily detached accessories before shipping.
Convertible tops and sunroofs: Check soft tops and sunroof seals for leaks or damage. These areas are vulnerable to weather during transport. Document their condition and ensure soft tops are properly secured before shipping begins.
Mechanical red flags: Note check engine lights, transmission issues, brake problems, or steering concerns. These issues could worsen during transport, and carriers may refuse vehicles with significant mechanical problems. Disclose all known issues to avoid pickup refusal.
| Common Issue | Why It Matters | How to Document |
|---|---|---|
| Paint Chips | Often disputed after delivery | Close-up photos, detailed notes |
| Windshield Chips | Can crack during transport | Photos with size reference |
| Modifications | Vulnerable to damage | Multiple angle photos |
| Mechanical Issues | May worsen in transit | Dashboard warnings, test drive |
| Loose Parts | Can detach during shipping | Photo and tighten if possible |
How Do You Complete the Carrier’s Inspection?
Complete the carrier’s inspection by walking through the vehicle together, comparing your documentation to their findings, ensuring all existing damage is noted on the bill of lading, and never signing blank or incomplete inspection forms regardless of carrier pressure to expedite the process.
Joint inspection process: Accompany the carrier driver during their inspection rather than letting them work alone. Point out every item you documented, cross-referencing your photos with their notes. This collaboration ensures agreement on vehicle condition before loading.
Bill of lading accuracy: Read the entire bill of lading before signing, verifying that every piece of existing damage appears in the notes section. If damage you documented doesn’t appear on their form, add it yourself or refuse to sign until they add it properly.
Never sign blank forms: Some carriers present partially completed or blank bills of lading, claiming they’ll fill it in later. This practice leaves you vulnerable to carriers claiming damage existed before transport that you have no way to dispute. Always insist on completely filled forms before signing.
Photo the completed bill: Take clear photos of the completed, signed bill of lading before the carrier leaves. This provides proof of exactly what was documented at pickup, preventing later alterations or disputes about what was noted during inspection.
Ask questions: If carriers note damage you weren’t aware of, ask them to show you the specific issue and photograph it yourself. This helps you verify whether noted damage genuinely exists or whether carriers are being overly cautious about minor blemishes.
For information about selecting reliable carriers who conduct thorough inspections, review our best car shipping companies comparison covering inspection practices and customer service quality.
Conclusion: Protect Yourself with Proper Inspection
Knowing how to inspect a car before shipping protects you from damage disputes, provides evidence for insurance claims, and gives you peace of mind during transport. The 15-20 minutes spent on thorough documentation can save thousands in potential repair costs and frustrating disputes with carriers.
Essential takeaways: Take 20-30 photos covering all angles, document every existing scratch or dent, record exact mileage and fuel level, remove all personal items, and never sign incomplete inspection forms. Your independent documentation provides leverage if carriers attempt to deny responsibility for damage.
Best practices: Conduct your inspection in good lighting, use a witness if possible, organize photos systematically, store documentation in multiple locations, and collaborate with carriers during joint inspection. These practices create bulletproof evidence of pre-shipping condition.
After delivery: Repeat this entire inspection process at delivery, immediately documenting any new damage before signing the delivery receipt. Compare delivery photos to pickup photos, noting any differences. Report damage to carriers within 24 hours as required by most shipping contracts.
Proper vehicle inspection before auto transport isn’t just recommended—it’s essential protection for your investment. Following this pre-shipping car inspection checklist ensures you’re prepared for any scenario, from smooth trouble-free transport to unfortunate damage requiring insurance claims.
Frequently Asked Questions
How do you inspect a car before shipping?
Inspect a car before shipping by taking 20-30 photos of exterior from all angles, documenting interior condition, recording exact mileage and fuel level, noting any existing damage on the bill of lading, and removing all personal items. This takes 15-20 minutes and protects you from damage disputes.
What should I photograph during car inspection before car shipping?
Photograph all four sides of the vehicle, close-ups of existing damage, odometer showing mileage, fuel gauge, windshield and windows, wheels and tires, and interior condition. Take 20-30 photos total from multiple angles with timestamps for evidence if damage disputes arise.
Why is vehicle inspection before auto transport important?
Vehicle inspection before auto transport is important because it provides legal evidence of pre-shipping condition, protects you from false damage claims, documents existing issues preventing carrier disputes, and establishes baseline condition needed for successful insurance claims if damage occurs.
What is included in a pre-shipping car inspection checklist?
A pre-shipping car inspection checklist includes exterior photos from all angles, interior condition documentation, exact mileage recording, fuel level check (quarter tank or less), fluid leak inspection, existing damage notation, warning light documentation, and personal item removal verification.
Should I sign a blank bill of lading?
Never sign a blank bill of lading. This document becomes a legal contract listing vehicle condition, and signing blank forms allows carriers to add damage claims later without your knowledge. Always verify all damage is properly noted before signing.
How much fuel should be in my car for shipping?
Keep fuel at quarter tank or less for shipping. Full tanks add unnecessary weight increasing costs and create fire hazards during transport. Document fuel level with photos of the gauge and note it on the bill of lading during inspection.
Can I leave personal items in my car during shipping?
Most carriers prohibit personal items, and their cargo insurance doesn’t cover belongings left in vehicles. Remove all items from glove box, center console, trunk, and compartments. Carriers may refuse transport if they discover prohibited items during inspection.
What happens if I don’t inspect my car before shipping?
Without proper inspection, you cannot prove damage occurred during transport versus pre-existing condition. Carriers will deny damage claims lacking evidence, leaving you responsible for repair costs. Independent documentation is essential for successful insurance claims and dispute resolution.